Websites using Google Tag Manager (GTM) can deploy Dataships Cookies Consent Tool by following these step-by-step instructions.
In this guide, we will show you how to:
- Implement the cookie consent banner
- Control cookie-setting tags
We assume that you've already created a GTM account, created a website container in GTM, and added the GTM container snippet to your website as required: https://support.google.com/tagmanager/answer/6103696
1. Implementing the cookie consent banner in GTM
First, log in to your GTM account (here) and click on the name of the container that is live on your website and ready to deploy the Dataships Cookies Consent Tool. Then, obtain the Dataships Cookies Consent Tool CMP tag template from the Template Gallery.
The easiest way to do this is by clicking the Get Started button on the Consent Overview.

You can find the Consent Overview by clicking on the  icon on the Tags section. If you don't see this icon, you can enable this function on the Admin tab, under Container Settings.
Check the "Enable consent overview" box under Additional Settings and save your changes:
When you click the Get Started button, a pane will slide in from the right where the Dataships Cookie CMP template should be one of the featured CMP templates.
Alternatively, add a new tag and click the "Discover more tag types in the Community Template Gallery" item.

Enter the keyword "Cookiebot" in the search field to find the Cookiebot CMP tag template.
Select the "Cookiebot CMP" item and click the "Add to workspace" button.

Confirm by clicking "Add".
Next, go to the Tags page. Create a new tag by clicking "New" ❯ "Tag Configuration" and select "Cookiebot CMP" from the list of standard tag types.
In the "Cookiebot ID" field, copy in the Domain Group ID from the Dataships Control Panel > Comply > Website Installation page.
In the Triggering section, choose "Consent initialization - All pages" and apply a name to your tag at the top of the configuration page, e.g. "Cookie Consent". Click "Save" to create the tag.
This is what your tag configuration should look like (except for the value of the Cookie ID):

Make sure that you have registered and saved the domain name(s) of your website(s) in Dataships Control Panel.
Dataships currently supports single domain/website only. If you have multiple domains/websites, please get in touch with us.
1.1 Defining the Google Consent Mode default consent state
The Dataships Cookie Consent Tool CMP tag registers default consent states for Consent Mode (detailed information can be reviewed here).
Under the collapsible configuration group ‘Default Consent State’ you can adjust which categories of cookies should be granted or denied before the end-user submits consent.
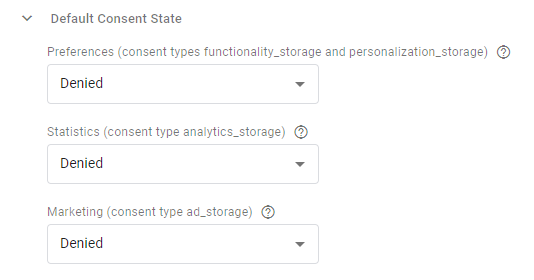
Since most data protection legislations, such as the GDPR, require so-called ‘prior consent', the default setting is ‘Denied’ for all categories. The category ‘necessary’ (mapped to consent type security_storage) is by default set to ‘Allow’ and is not configurable, as it does not require consent.
GTM by default supports 5 different consent types that are automatically mapped by Dataships Cookies Consent Tool to the 4 categories as follows:
| GTM Consent Type | Mapped Type | Description |
| ad_storage | marketing | Enables storage (such as cookies) related to advertising |
| analytics_storage | statistics | Enables storage (such as cookies) related to analytics e.g. visit duration |
| functionality_storage | preferences | Enables storage that supports the functionality of the website or app e.g. language settings |
| personalization_storage | preferences | Enables storage related to personalization e.g. video recommendations |
| security_storage | necessary | Enables storage related to security such as authentication functionality, fraud prevention, and other user protection. Users will be informed about the specific storage purposes in the cookie declaration, but this type does not require consent from the end user. |
2. Controlling cookies
Google Tag Manager includes several features that work together with Dataships Cookies Consent Tool to help you manage how tags behave in response to the end user's consent choices.
Specific tags (such as Google Ads, Analytics, Floodlight, and Conversion Linker) have built-in consent checks. This means that these tags include logic that automatically changes the tag's behavior based on the user's consent state. No consent configuration is needed for this type of tags*.
Tags that do not have built-in consent checks, which do utilize tracking, must be configured with additional consent checks. Opposed to tags with built-in consent checks, which load regardless of consent, tags configured with additional consent checks will not fire unless consent has been given for the corresponding storage category.
In the next section we will provide instructions to configure additional consent checks.
*It is important to note that because tags with built-in consent check load regardless of consent, data will be transmitted to Google without explicit permission from the visitor. If this is of concern to you, it is recommended to configure tags with built-in consent with additional consent as well. That way the tag will not load prior consent.
2.1. Setting up Additional Consent Checks
- In your GTM container, create the following trigger, to be used in your GTM configuration:
Event Name: cookie_consent_update
Event Type: Custom Event
Fires On: All Custom Events
Your trigger should look similar to this: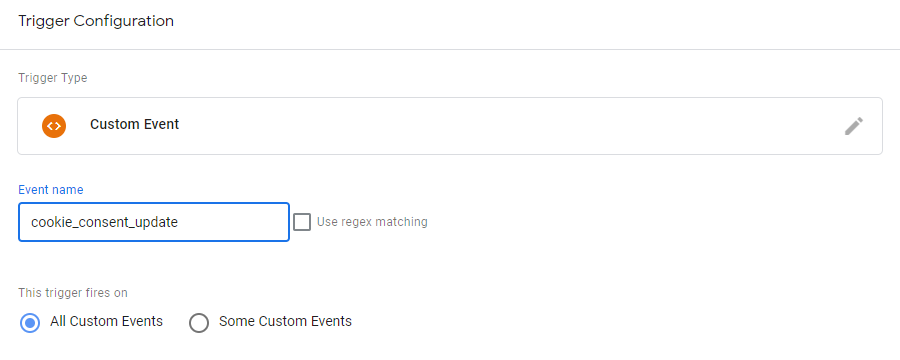
- Edit the consent settings for all tags that need to be configured with additional consent.
You can find these settings in the Tag Editor ❯ Advanced Settings ❯ Consent Settings (BETA).
Add all storage categories which the tag requires (see the scan report from Cookies if you are in doubt).
In this example the tag requires consent for ad_storage / marketing cookies: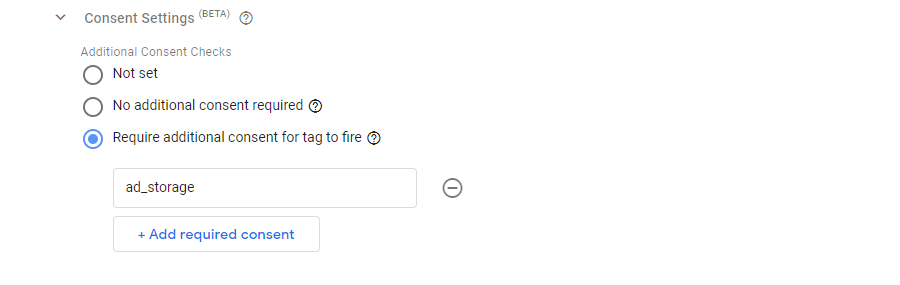
- To ensure the tag fires as soon as consent choices have been determined, either from a previous visit or from interaction with the banner the normal "All Pages" trigger will need to be replaced with the trigger which we created in the first step.
Here is an example with a Facebook Pixel tag, which with this setup only fires if the visitor has opted in on the required consent type:
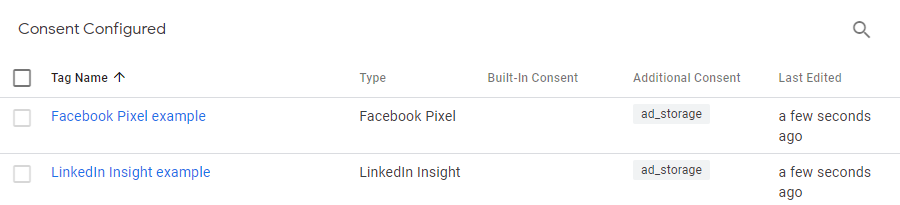
For a complete view of the consent settings across all the tags in your container, you can enable the Consent Overview from your container settings: